Sakai Lessons
Sakai Lessons tool allows you to structure content pages within the Sakai course site. This tool is very useful to lending structure to the workflow and content of a course, especially if the instructor is “flipping” course content, teaching a hybrid course, or teaching exclusively online.
Click here to download a PDF version for instructions for using Sakai Lessons.
You can also watch this short video on creating Lesson Templates in Sakai.
Adding the Lessons Tool to Sakai:
To start, you must add the lessons tool to your Sakai site. Here are instructions for this process:
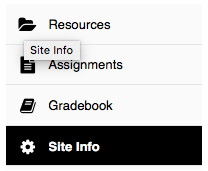
- Go to the Sakai course site where you want to build the Lessons, and select “Site Info” from the left hand menu.
- From Site Info, select the “Manage Tools” tab from the top of the screen.
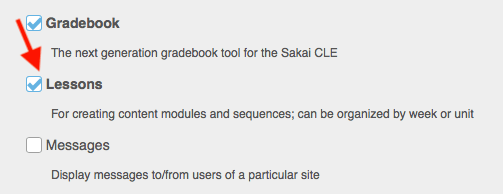
- Check off the box for “Lessons”, scroll to the bottom of the page and click “Continue”.
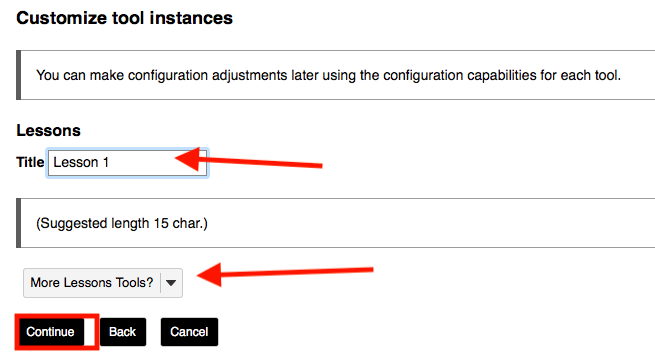
- Give the Lesson page a name. Note that you can build multiple pages from this screen using the “More Lesson Tools?” dropdown menu. Name all the pages you would like to build, and then click “Continue”.
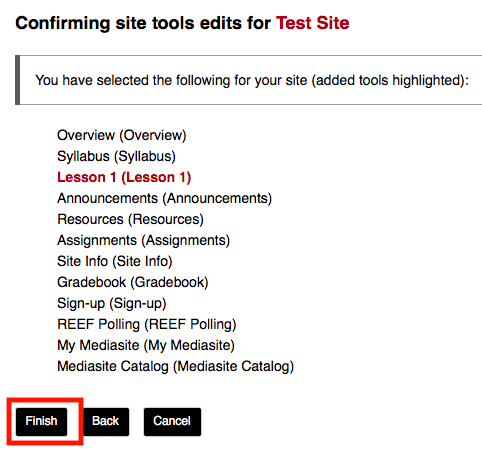
- The next screen will confirm the creation of these new Lesson pages, and you just need to click “Finish”.
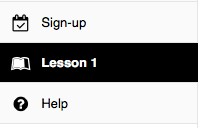
- Now the Lesson pages will appear in the left hand menu of the Sakai site.
Hiding/Editing Order of Lesson Tools:
If you would like to change the order of the where the Lessons appear in the left hand menu, or if you would like to make some pages invisible to students for a period of time, follow these instructions.
- In the Sakai site where you have added the Lesson tools, select “Site Info” from the left hand menu.
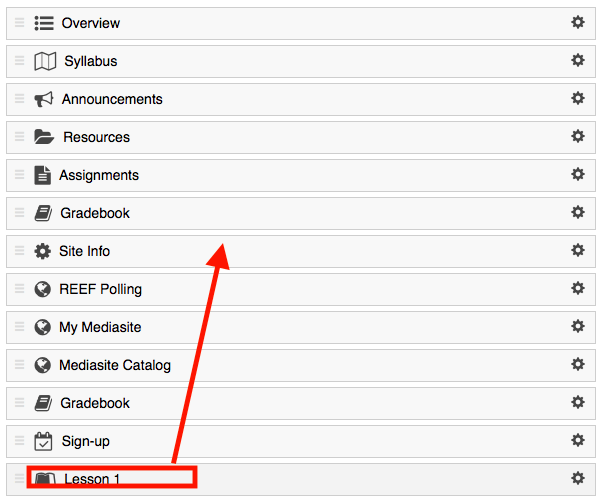
- In Site Info, select the “Tool Order” tab from the top of the screen.
- You can drag and drop the tools to re-arrange them in the site’s left hand menu. You can also hide tools by clicking the settings wheel to the right of the tool and selecting “Make Tool Invisible to Students”. Scroll down and click “Save” for the changes to take effect.
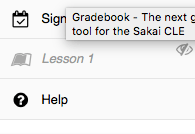
- You will know a tool is hidden to student view when it is greyed out in the left hand menu, as seen below. You can still make edits it to it, and when you are ready for students to view it again, simply return to “Tool Order” and select “Make Tool Visible to Students”.
Adding Content to a Lessons Page:
You can add different media to Lesson pages, and you can even link the Lesson to other Sakai tools such as Assignments or Forums. The following are instructions for editing your Lessons pages.
- To edit a Lesson page, start by selecting the page from the left hand menu.
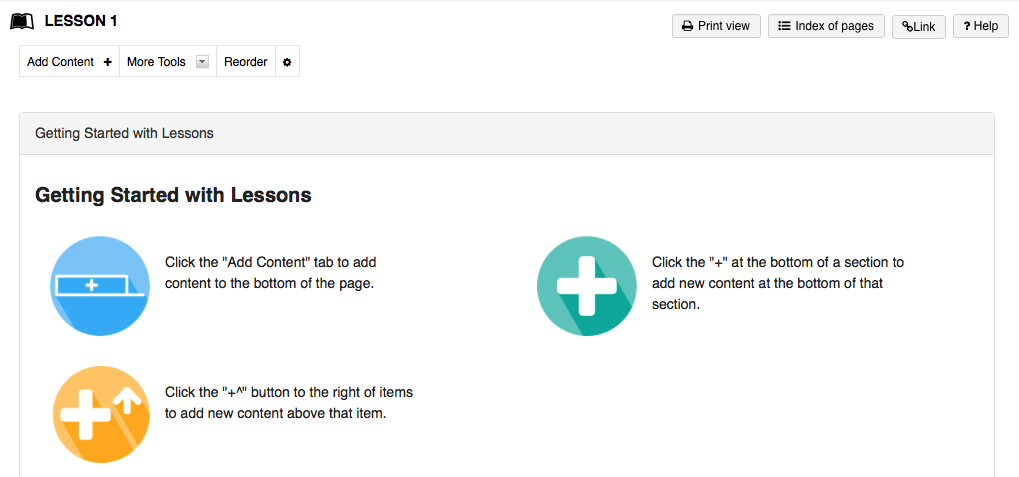
- When you edit a page for the first time, it will look like the screen seen below. As you can see, some information is included about adding content to a Lesson page. Once you make an edit, these instructions will disappear, but if you need to access them again simply click the “HELP” button.
To get started, click the “Add Content” button.
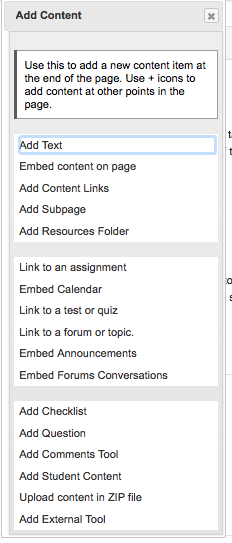
- When you click “Add Content” you will get the following menu of options. Here is a quick list of what the main options entail:
- Add Text: This will bring up a text editor where you can type in or paste content. Using this editor you can also embed images and hyperlinks to accompany your text.
- Embed content on this page: You can upload files from your computer right into the Lesson page. You can also paste the embed code for items like YouTube videos or Prezis.
- Add Content Links: This allows you to share website URLs on the Lesson page
- Add Subpage: You can build multiple pages in the Lesson tool if needed. Each page will have the same options for adding content.
- Link to…: You can link to a Sakai assignment, test/quiz, or forum. However, you must FIRST build the assignment/test/forum in order to link to it.
- Add Checklist: You can add a Checklist to the Lesson page to guide students through a series of activities/assessments.
- Add Comments Tool: You can build dialogue with students within a Lesson page by adding this tool.
- Add Student Content: This allows students to build their own pages. They can work as groups as individuals, view each other’s work, and even provide comments for feedback.
Organizing Content on a Lesson Page:
Once you add a content item to the Lesson page, whether it be text, an embedded video, etc., you will be given some options for editing and organizing that content. Here are some instructions on organizing the content of a lesson page.
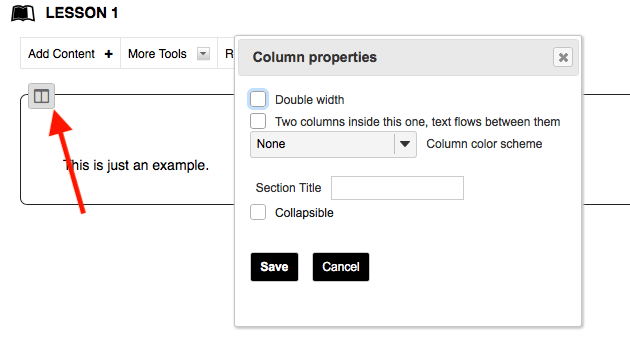
- To the right side of the screen you see icons for editing content, deleting content, or adding content above or below. To left of the screen you will see an icon for changing the column properties.
- If you select “Column Properties” you will get the options below. You can better use the page’s layout by creating two columns, and you can even create a color scheme.
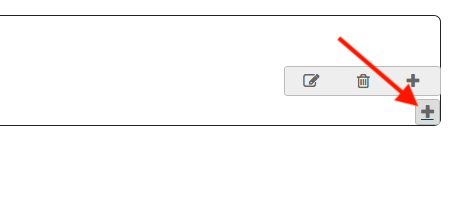
- Now, if you wanted to add content to the right column you would click the “plus” symbol in the bottom right corner of the content box.
- Now you will get the same “Add Content” menu and you can choose whatever type of content you wish to have display in that column.


